It sounds like a sneeze gone awry.
Have you ever eaten sauerkraut? How about sourdough bread? If so, then you have enjoyed some good fermented food!
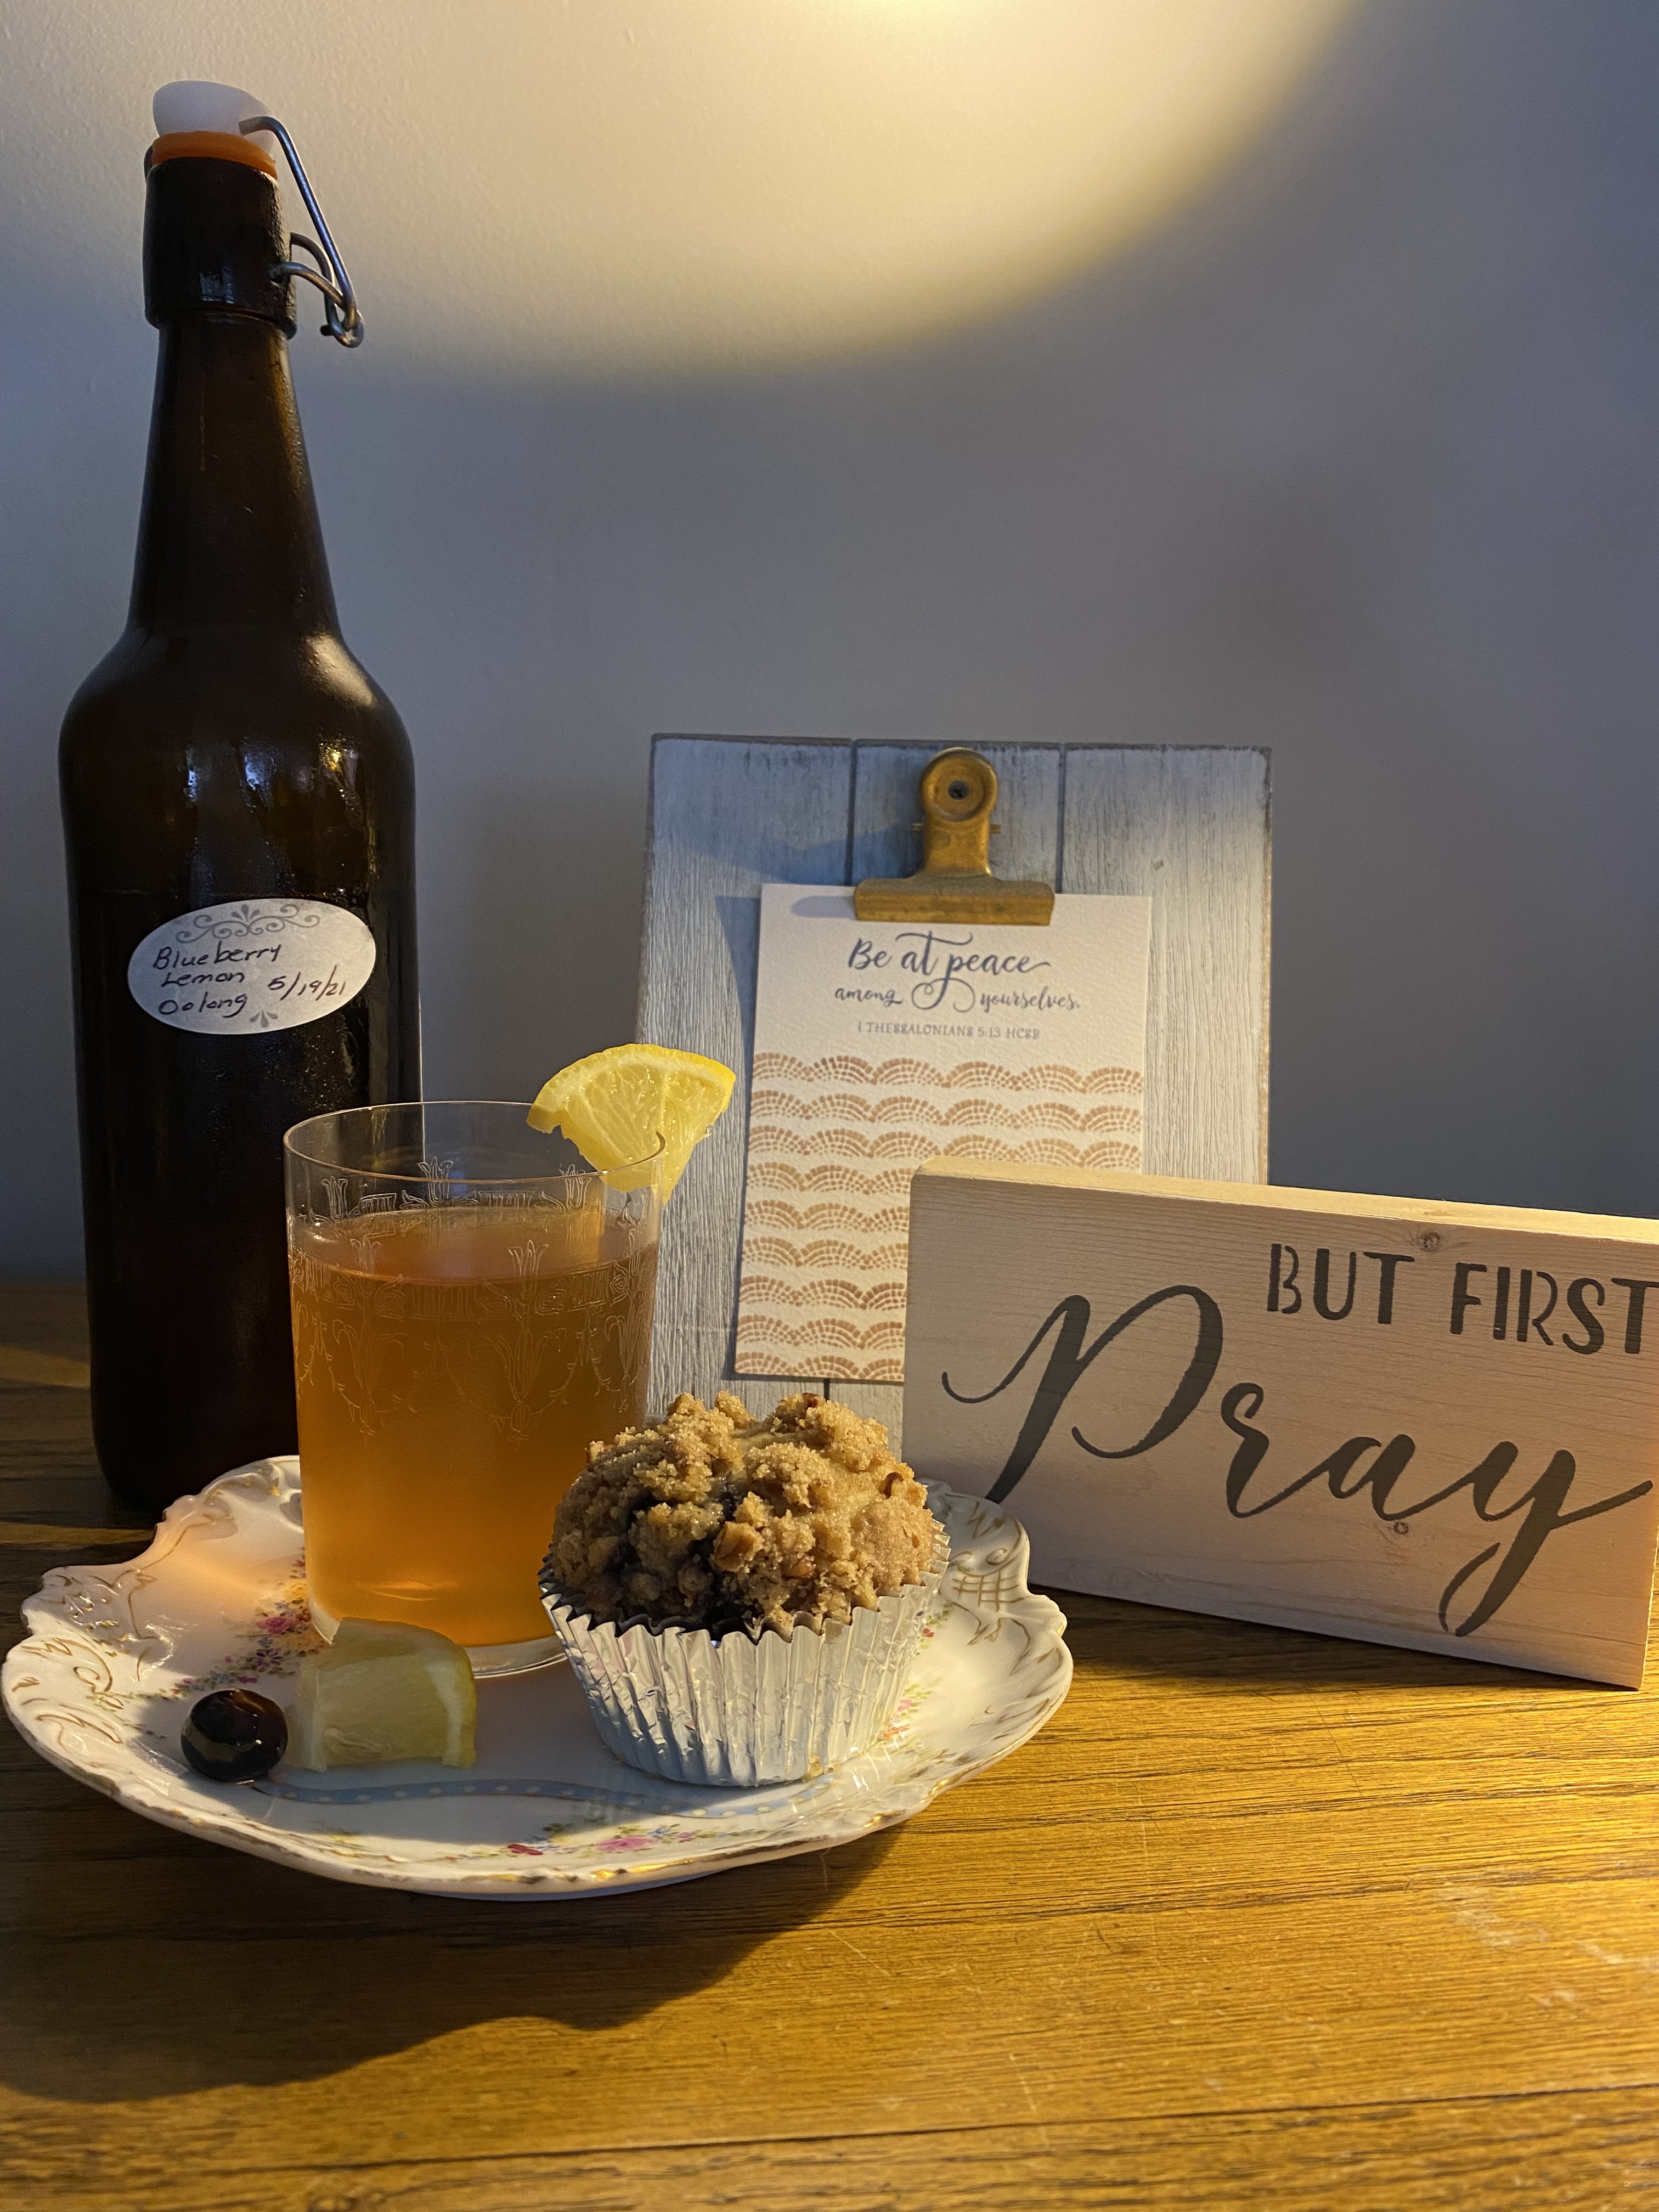
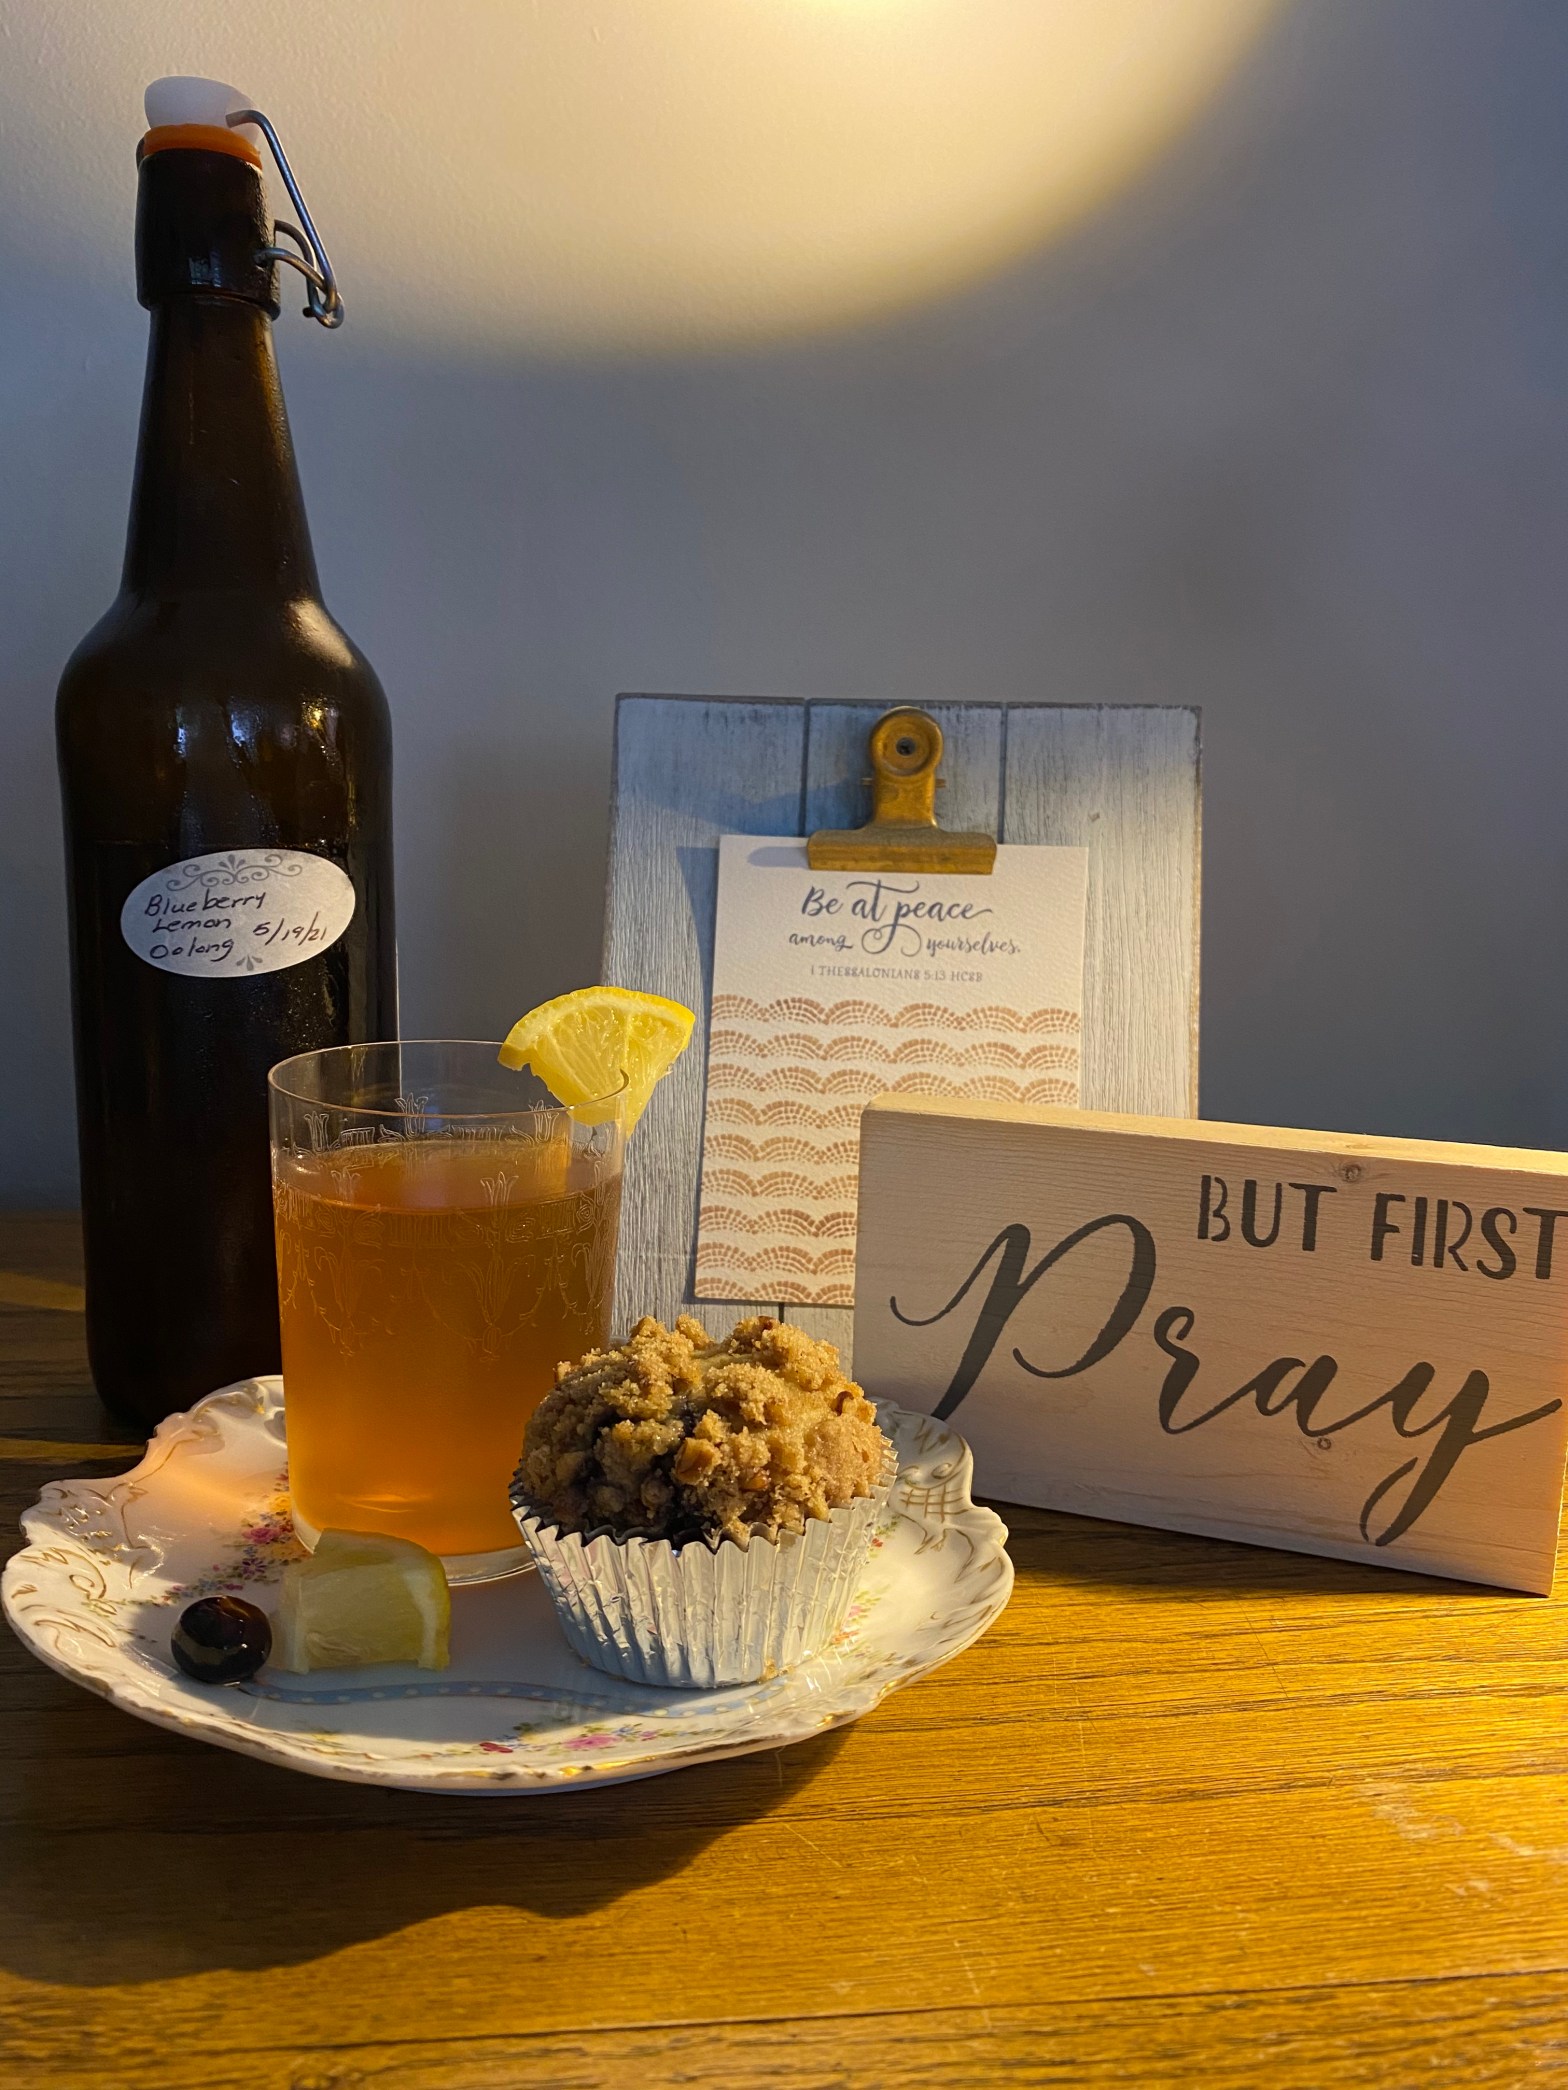
For those who don’t know, kombucha is a fermented sweet tea drink loaded with many reported and scientifically acclaimed probiotic health benefits. Some of those benefits include improved digestion, immunity, absorption of nutrients, reduced allergies, detoxification of the body, prevention of UTIs, and restoration of balance after a round of antibiotics. There are skeptics, but I prefer to enjoy this delicious drink, knowing it is benefitting my body. That said, please check with your doctor if you have any doubt that you can eat or drink anything fermented. We want to keep everyone safe.
In years past, there has been concern that kombucha is an alcoholic drink because it is fermented, and the fermentation process produces alcohol. Most kombucha sold in stores has an alcohol content of .5% or less. In comparison, a bottle of beer has 2.5% or more. You would have to drink a whole gallon of kombucha at once to feel anything, if at all. A dose of cough syrup has more alcohol content than most kombuchas. The great thing about making your own is you have control over the ingredients and the fermentation time frame, which regulates the amount of alcohol allowed to form. You can ferment kombucha for a week or several weeks, but the longer you let it brew, the more alcohol content. There is a sweet spot for time and temp to get just the right amount of carbonation and sweetness. Experimentation is key.
Commercially prepared kombucha is expensive. When I first started making it, you could only find it in health food stores and restaurants, but now you can buy it in grocery and drug stores as well as the big box stores like Walmart or Target, and you can expect to pay $2.50 to $4.50 for a 16-ounce bottle. Making it yourself is much cheaper. I estimate my kombucha costs about $.40 per 16 ounces to make. That’s a significant saving. It’s also fun because you can get creative with your tea blends and flavor additions.
Your start-up supply needs are simple. First, you need to buy a SCOBY, which stands for “Simbiotic Culture of Bacteria and Yeast”, or you can make your own if you prefer and have the time, but you can start on your process sooner if you buy it. I purchased my SCOBY on Amazon for about $19.
You will also need a one-gallon glass jar and a breathable cover for it, stainless steel cooking pot, stainless steel spoon, a thermometer, a funnel, PH test strips, bottles with sealed flip tops, and a heat source. They sell little heat wraps that wrap around your gallon jar during fermentation, but when I first got started, I used a heat mat for a reptile enclosure. It worked great and kept the brewing cupboard just the right temperature, between 72 and 78 degrees. Warmer temperatures will make the kombucha ferment faster, and cooler temperatures will allow mold to grow, so it’s best to keep a close eye on the temps. You also need 2 cups of plain (not flavored) kombucha that you can get at the store. This kombucha is your starter that tells the SCOBY “Hey, wake up! We have work to do!”. All start-up materials are available online or at businesses that sell brewing supplies.
Here is the bare-bones process:
First, you make sure all your utensils and equipment are clean and air-dried.
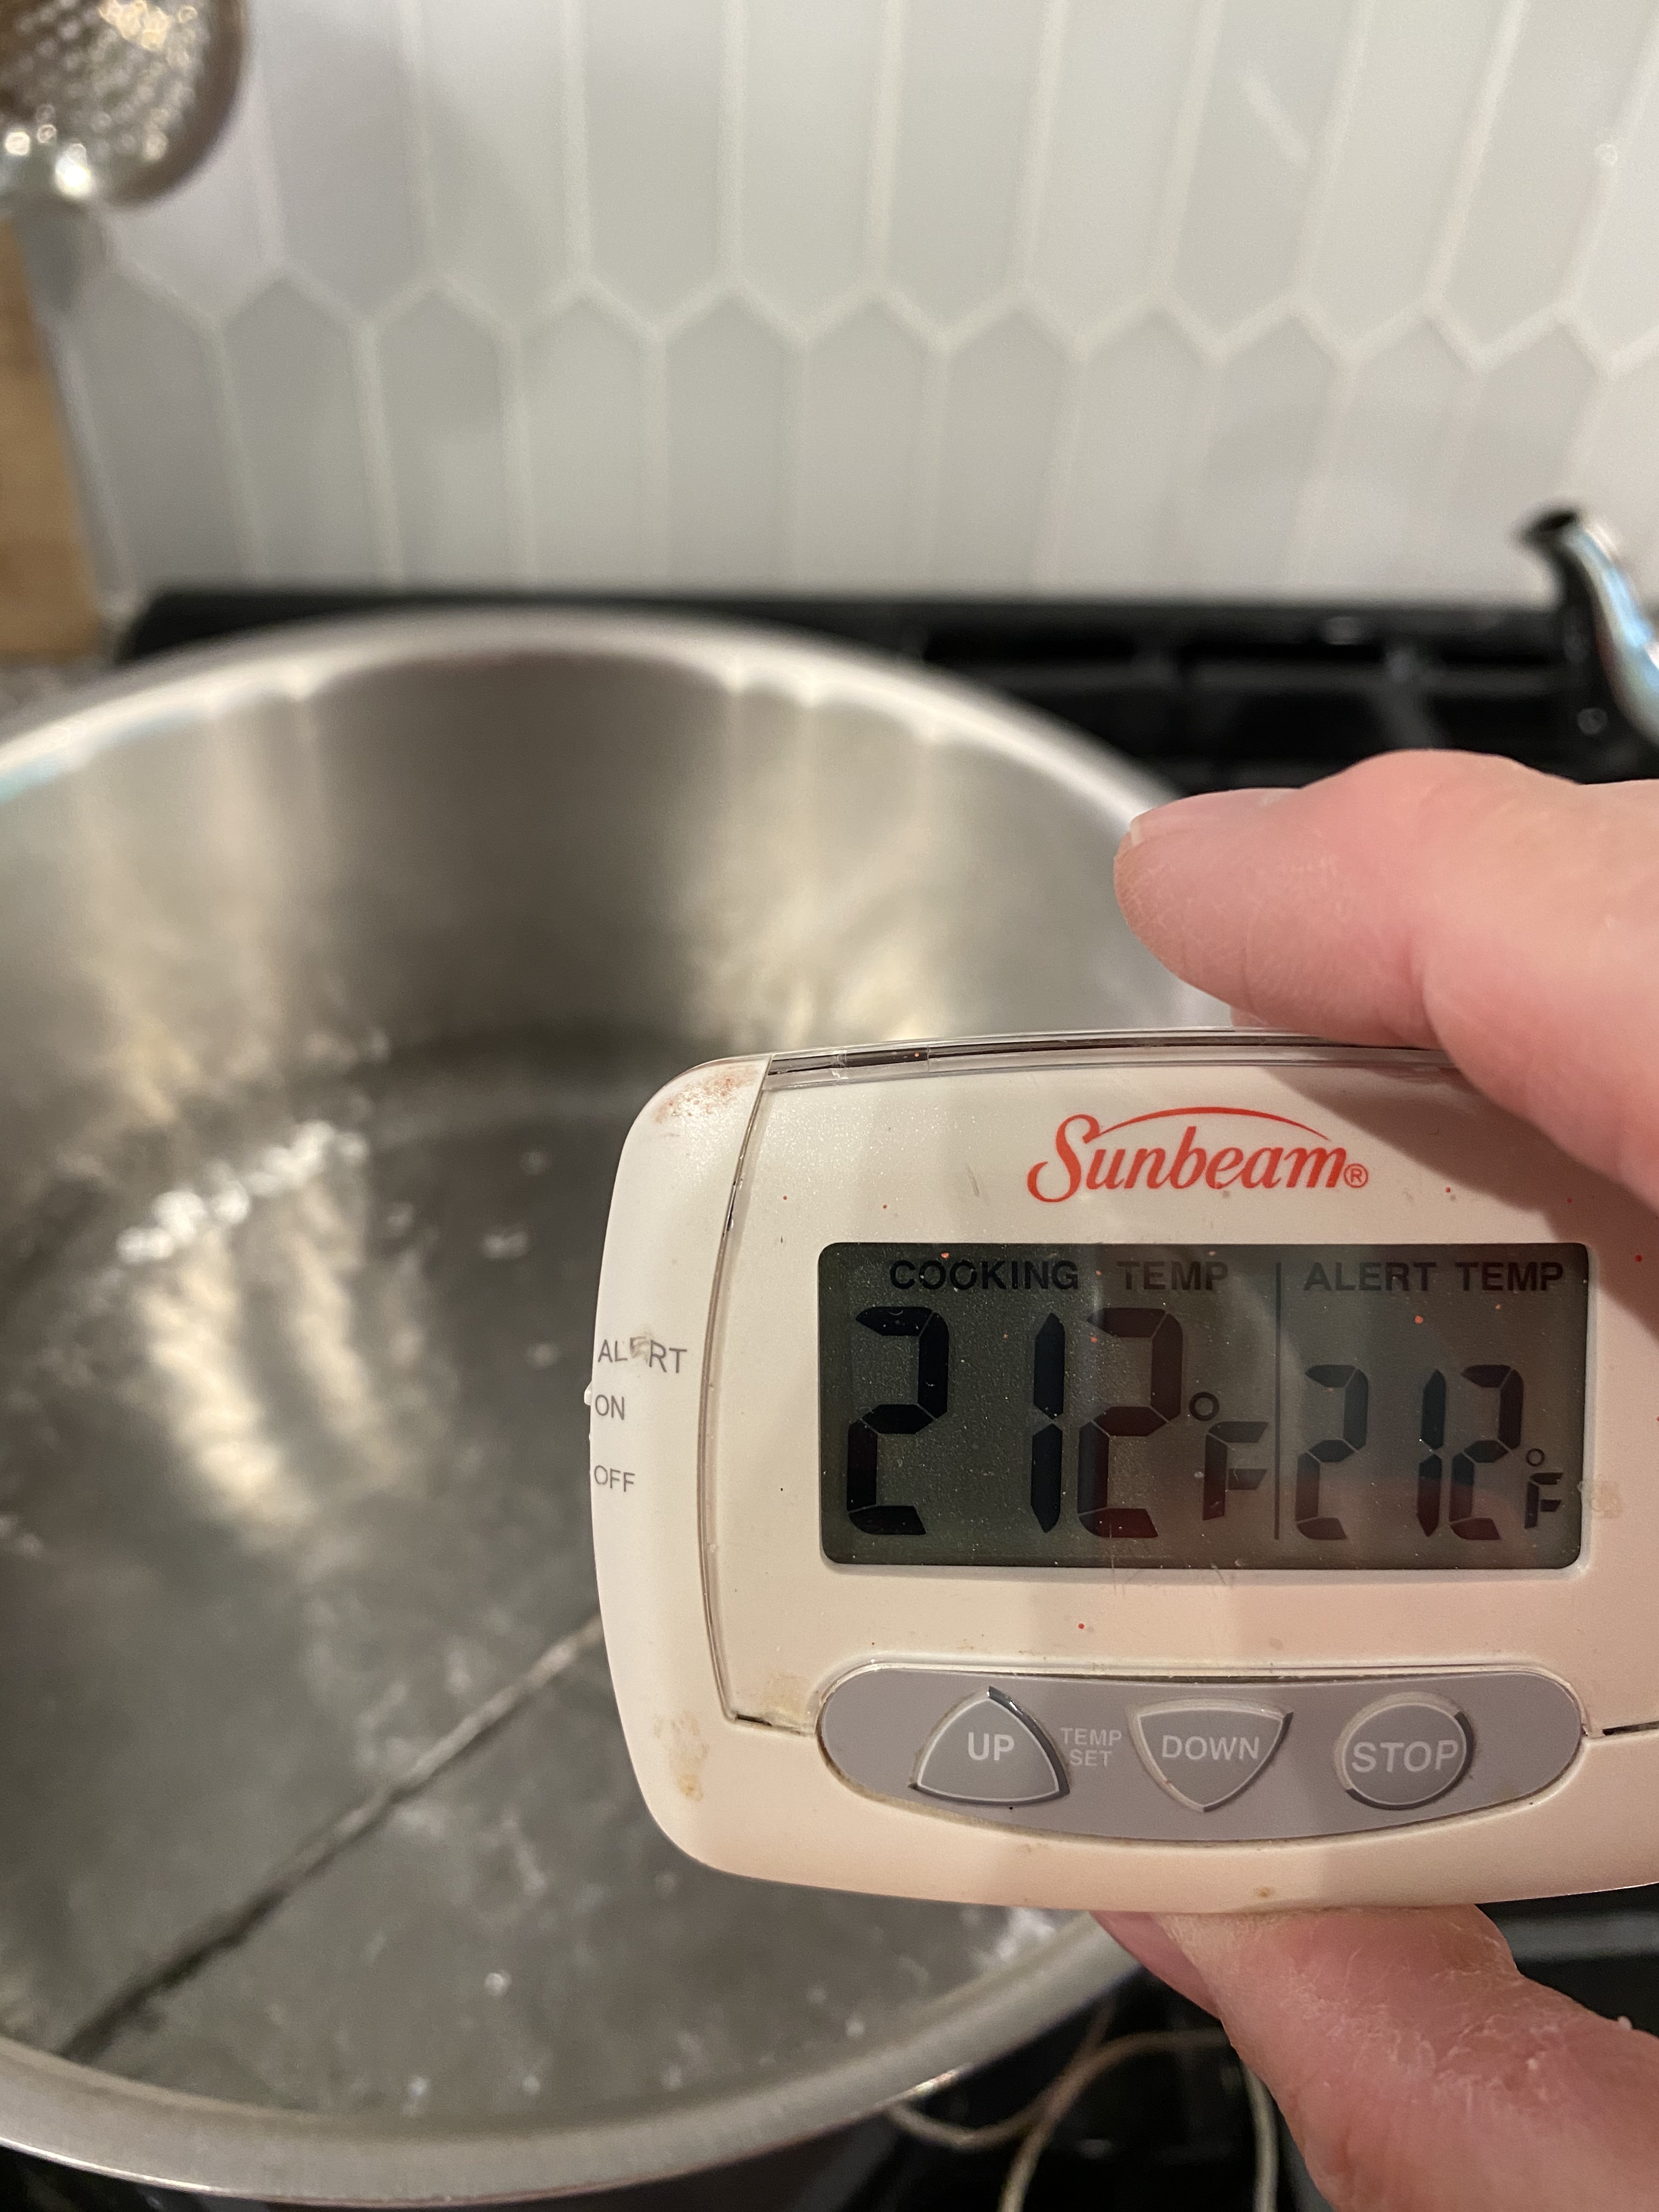
Now it’s time to brew your sweet tea. Heat 7 cups of pure, filtered water (I use a Zero filter system which filters out nearly everything) to 212 degrees if you are brewing black tea, 170 for green tea, or 185 for Oolong tea. I use black tea in my basic recipe. It’s stronger and sweeter, but green tea and Oolong are lighter and very good with citrus and fruit infusions. Experiment!

Take the hot water off the fire and add your tea bags or loose tea. Use the best quality tea you can afford, and do not use flavored tea which doesn’t brew well. Let the tea steep for four minutes, then remove the tea bags or strain the loose tea.

Add 1/2 c. organic cane sugar or turbinado sugar which is even less processed, and stir until dissolved.
Add 7 cups cold, filtered water to the tea and stir.
Cover with a paper towel and cool the tea until it reaches 72 degrees or less. The live kombucha culture you are going to add cannot tolerate warmer than 72 degrees.
Once your tea has cooled, stir in the plain, room-temperature kombucha you bought. You only have to buy it once because the starter kombucha for your next batch will come from the brew you are making.
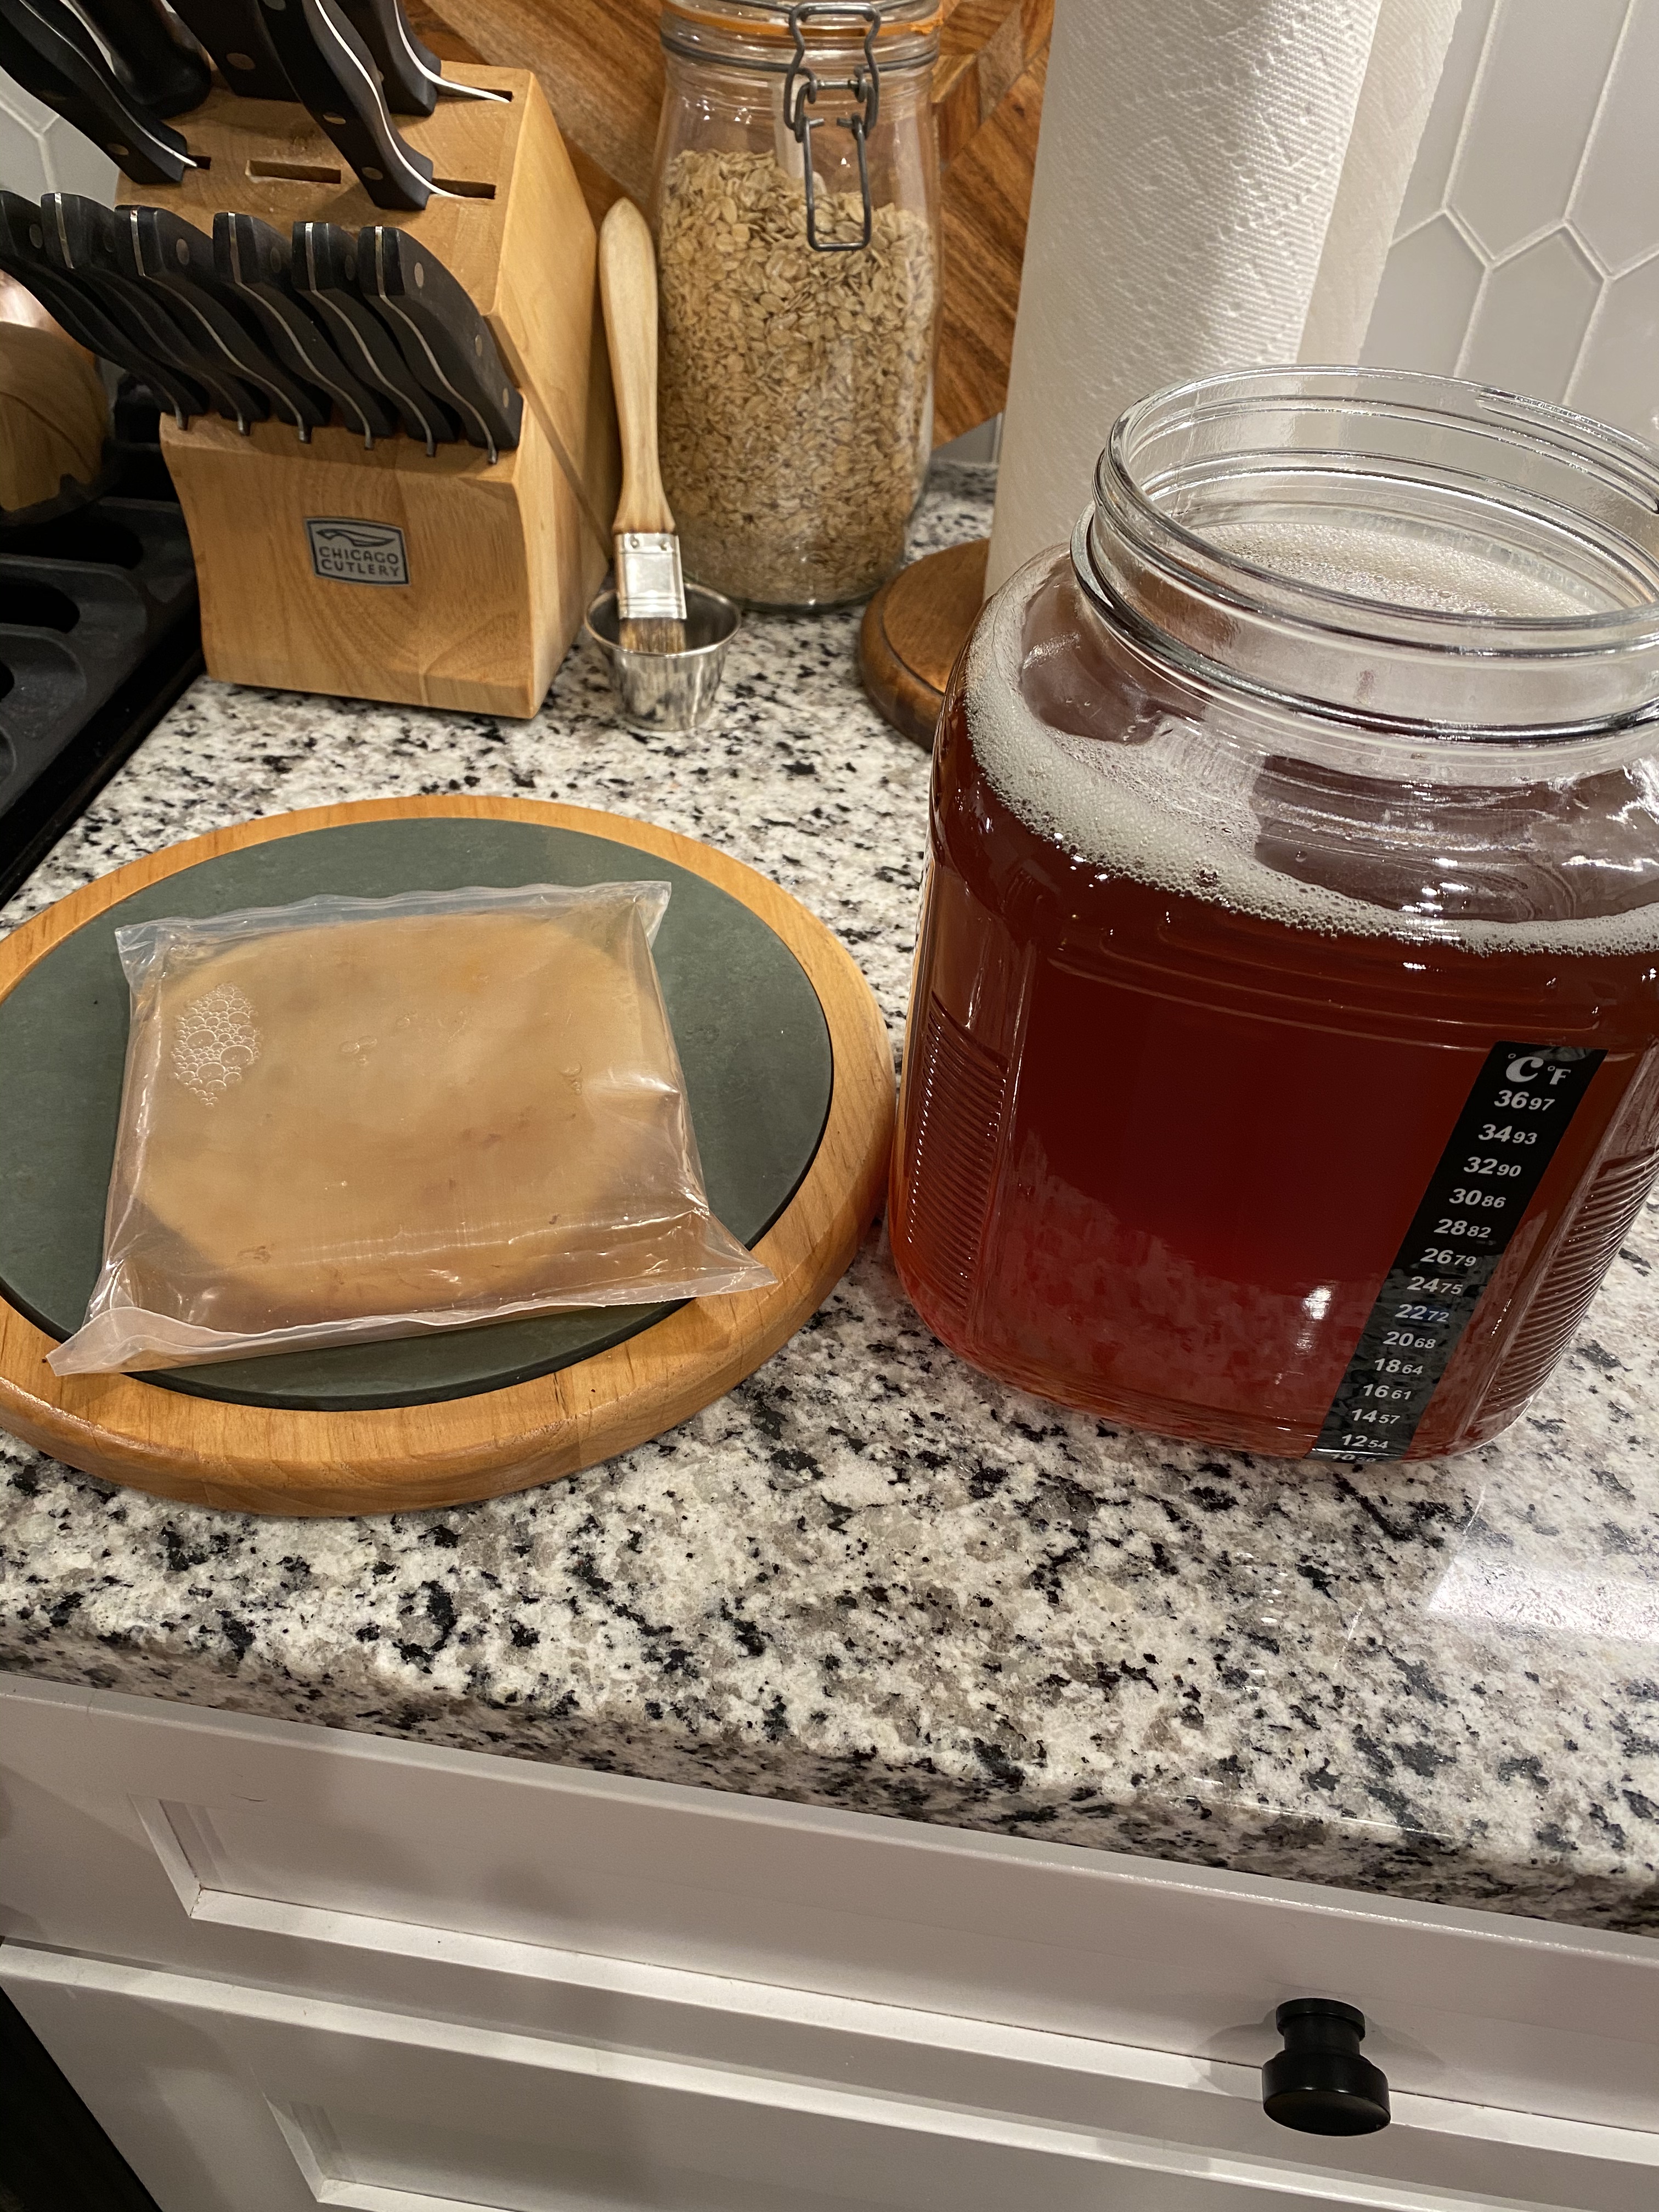
Pour the cooled tea into the 1-gallon jar.
Now you are ready to add the SCOBY. Gently place the SCOBY on top of the tea. It feels gelatinous and kind of slimy. If it sinks, it’s okay.

Cover the jar with a breathable top. The kombucha must have air. I have used a coffee filter and a rubber band with good results. I don’t recommend cheesecloth as the mesh isn’t tight enough to keep tiny fruit flies from entering and ruining your batch. I’ve done that, and it’s sad. I found reusable mesh tops with a drawstring pull in a three-pack, and they’re perfect.
I use a stick-on thermometer outside the jar, making it easier to monitor how warm it’s getting in the process, but it’s optional.
Time to put your kombucha to bed in a nice warm, dark place where it won’t be disturbed for 7 to 10 days. Use your little heater if it’s not consistently warm enough in your space. It doesn’t have to touch the jar but must be near enough to keep it warm. After seven days, use a PH strip to test. Ideally, you want the PH to be between 2.5 and 3.5. A PH of 4 is okay because harmful bacteria cannot live in that acidity.
You also can taste test your kombucha by dipping in a straw along the side and take a sip. If it tastes too sweet, it needs more time. Give it another day or two. If it tastes vinegary, oops, it’s fermented too long. Please don’t throw it out! You can use it in other ways! You can use it to make sauces and salad dressings, candies, mayo, and even skincare products. I’ve read you can even use it for a sourdough starter.
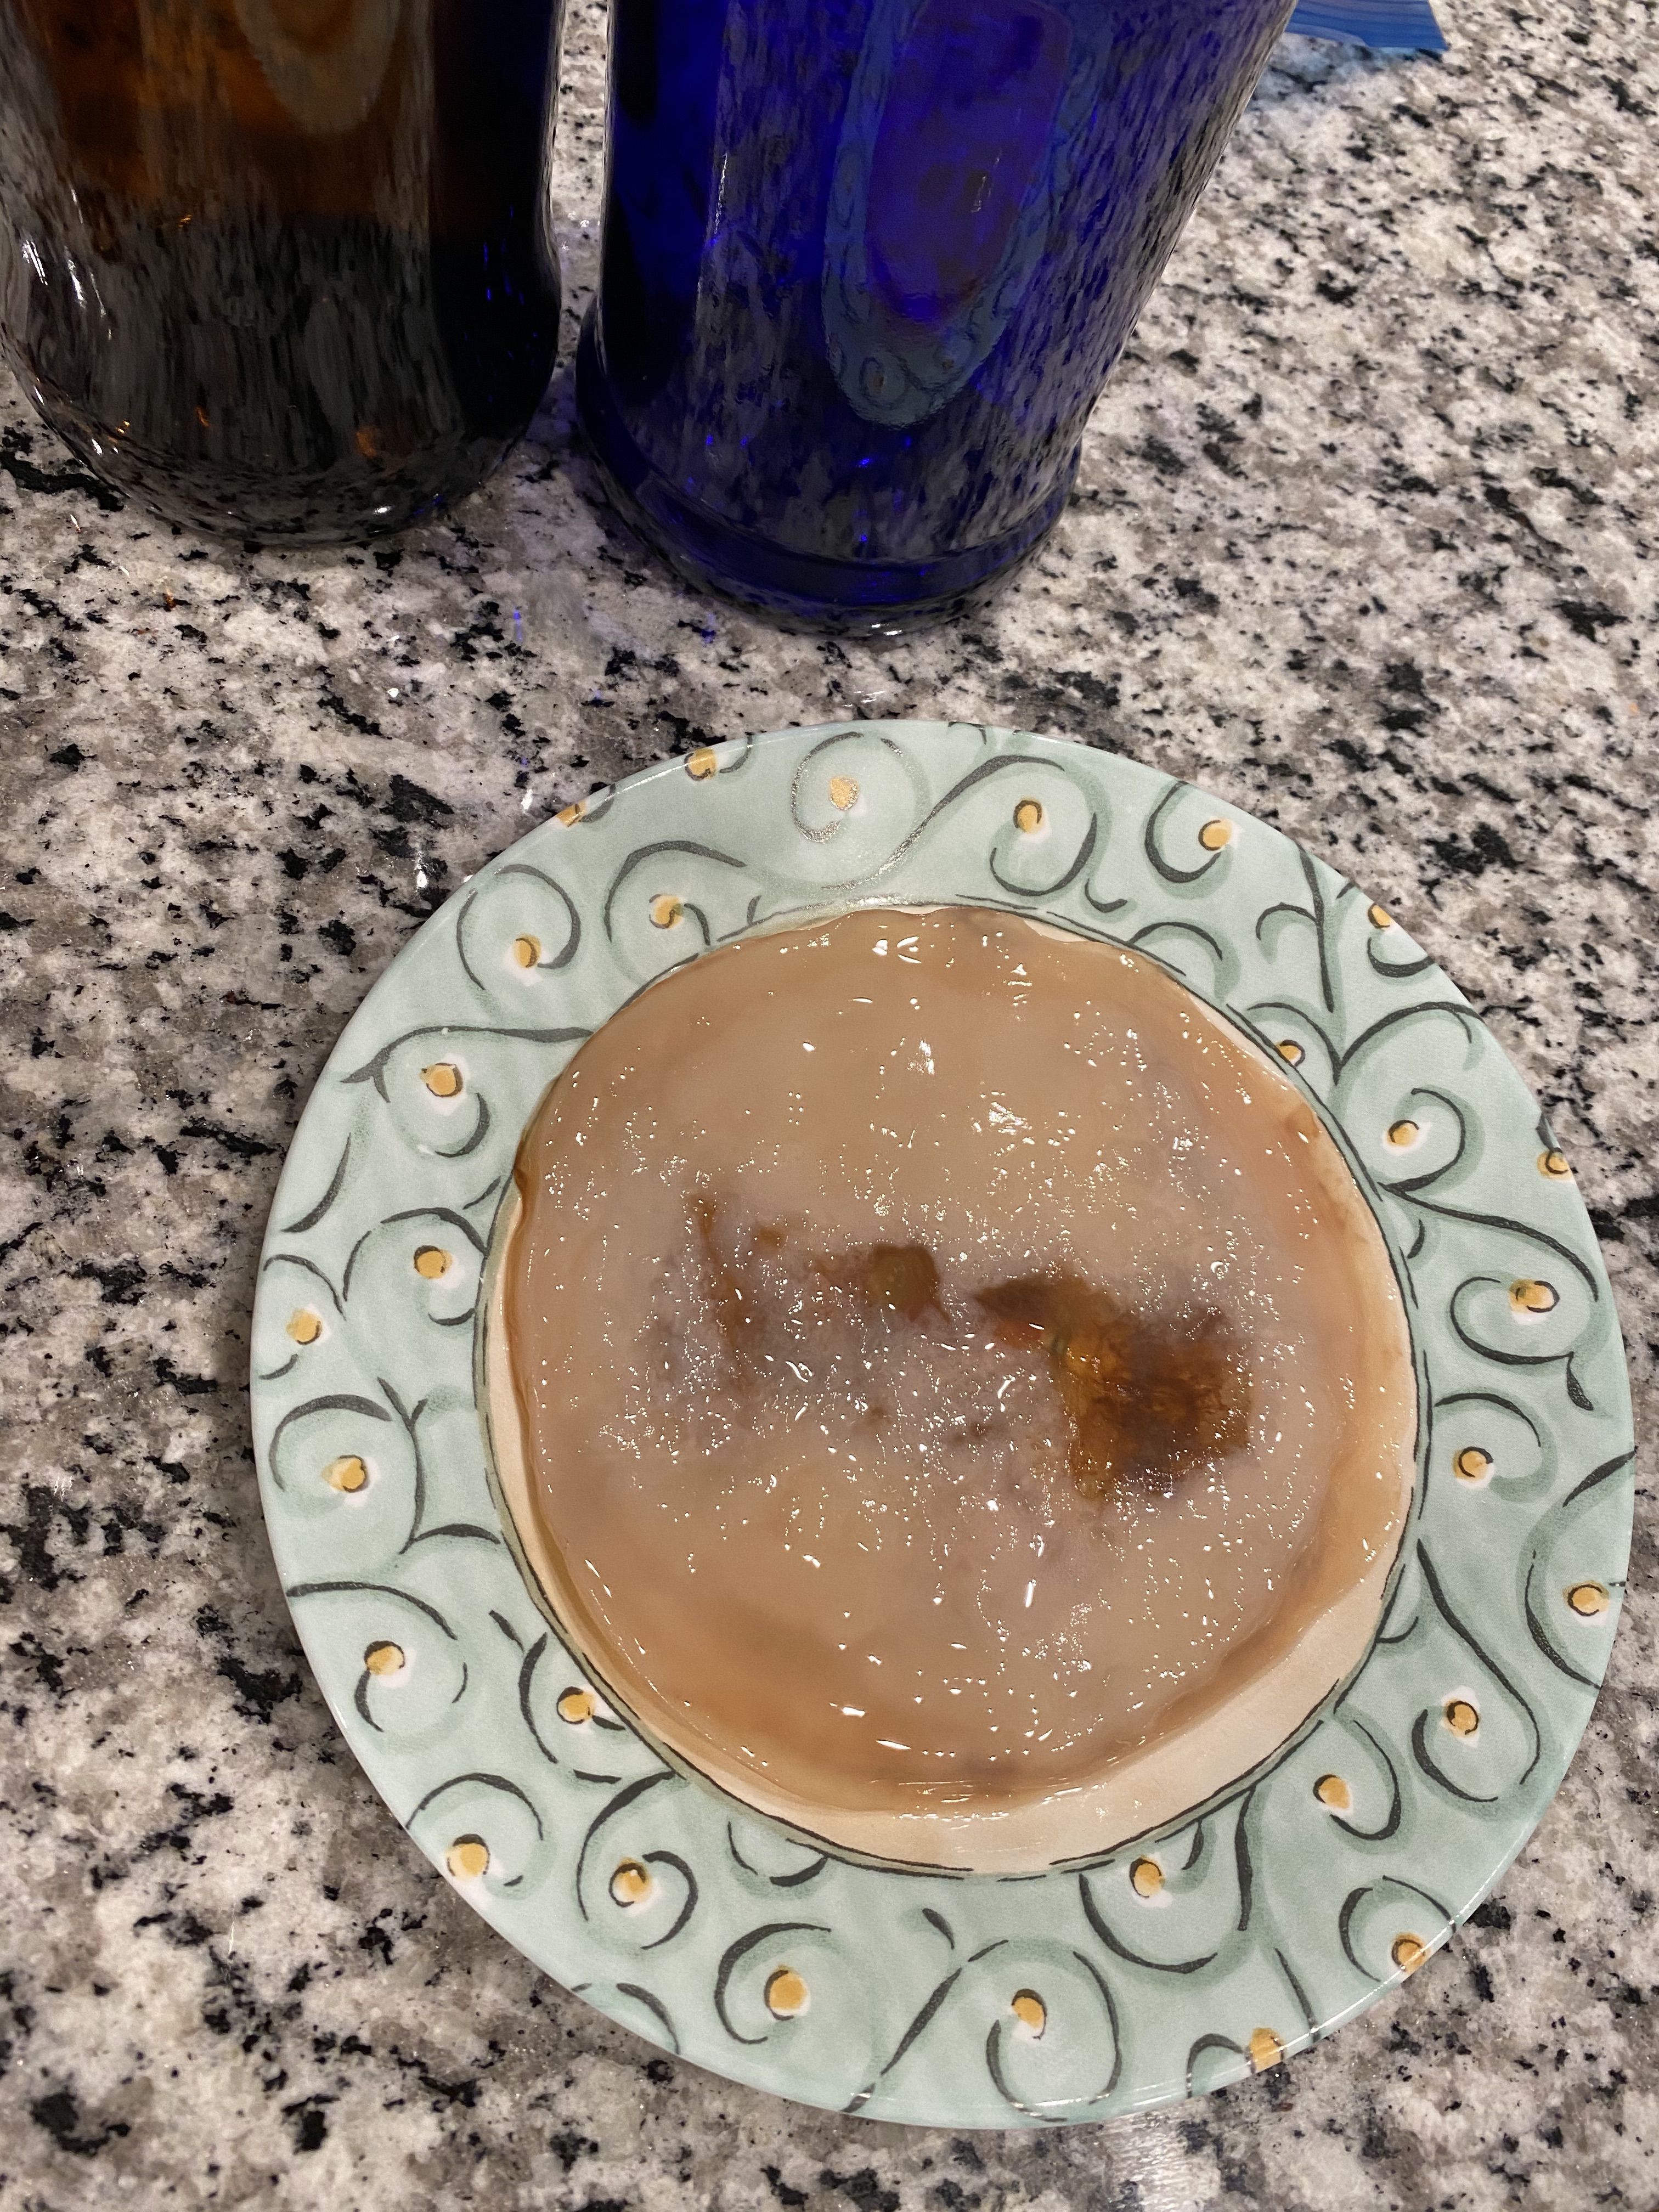
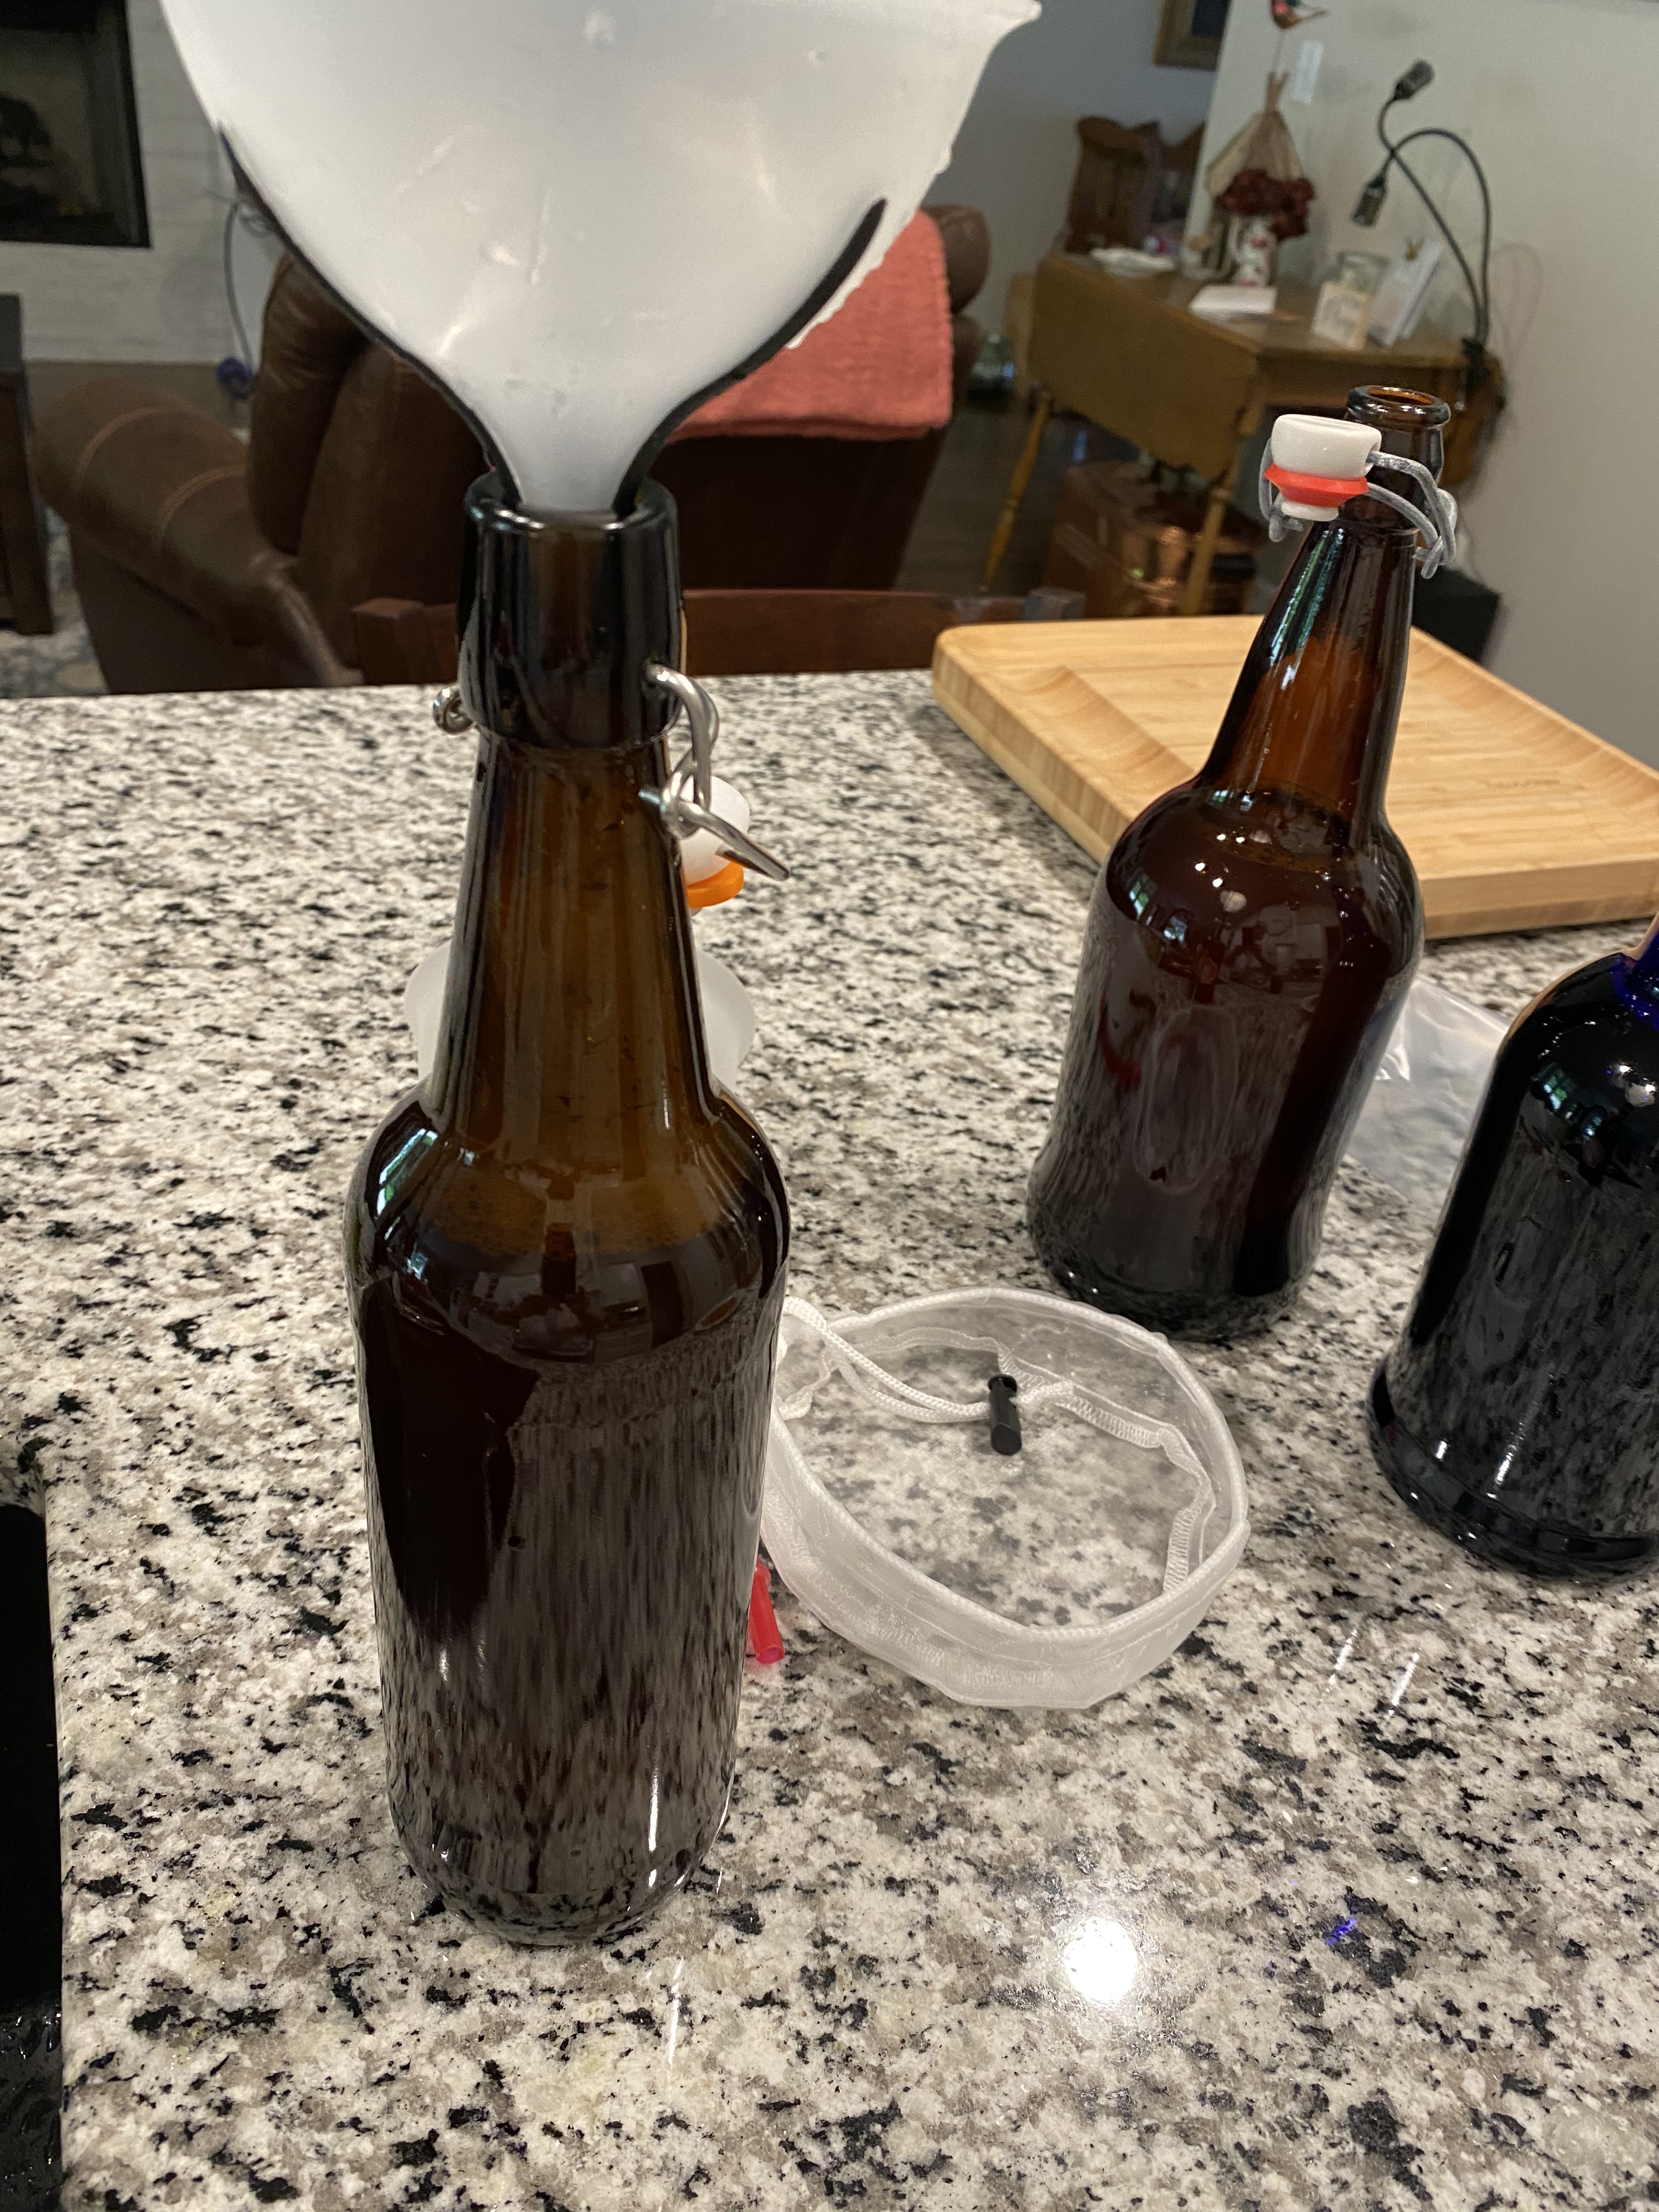
If all is well, remove the SCOBY and place it on a clean plate with some kombucha to soak it while you fill the bottles. Ladle 2 cups of kombucha into a mason jar for refrigeration. This portion will be your starter for the next batch.


If you desire to add fruits, spices, or juice, this would be the time to add them to the bottles according to your recipe. Then using a funnel, pour the kombucha into the bottle, leaving 1″ of airspace at the top. Close the sealing caps and check for leakage.
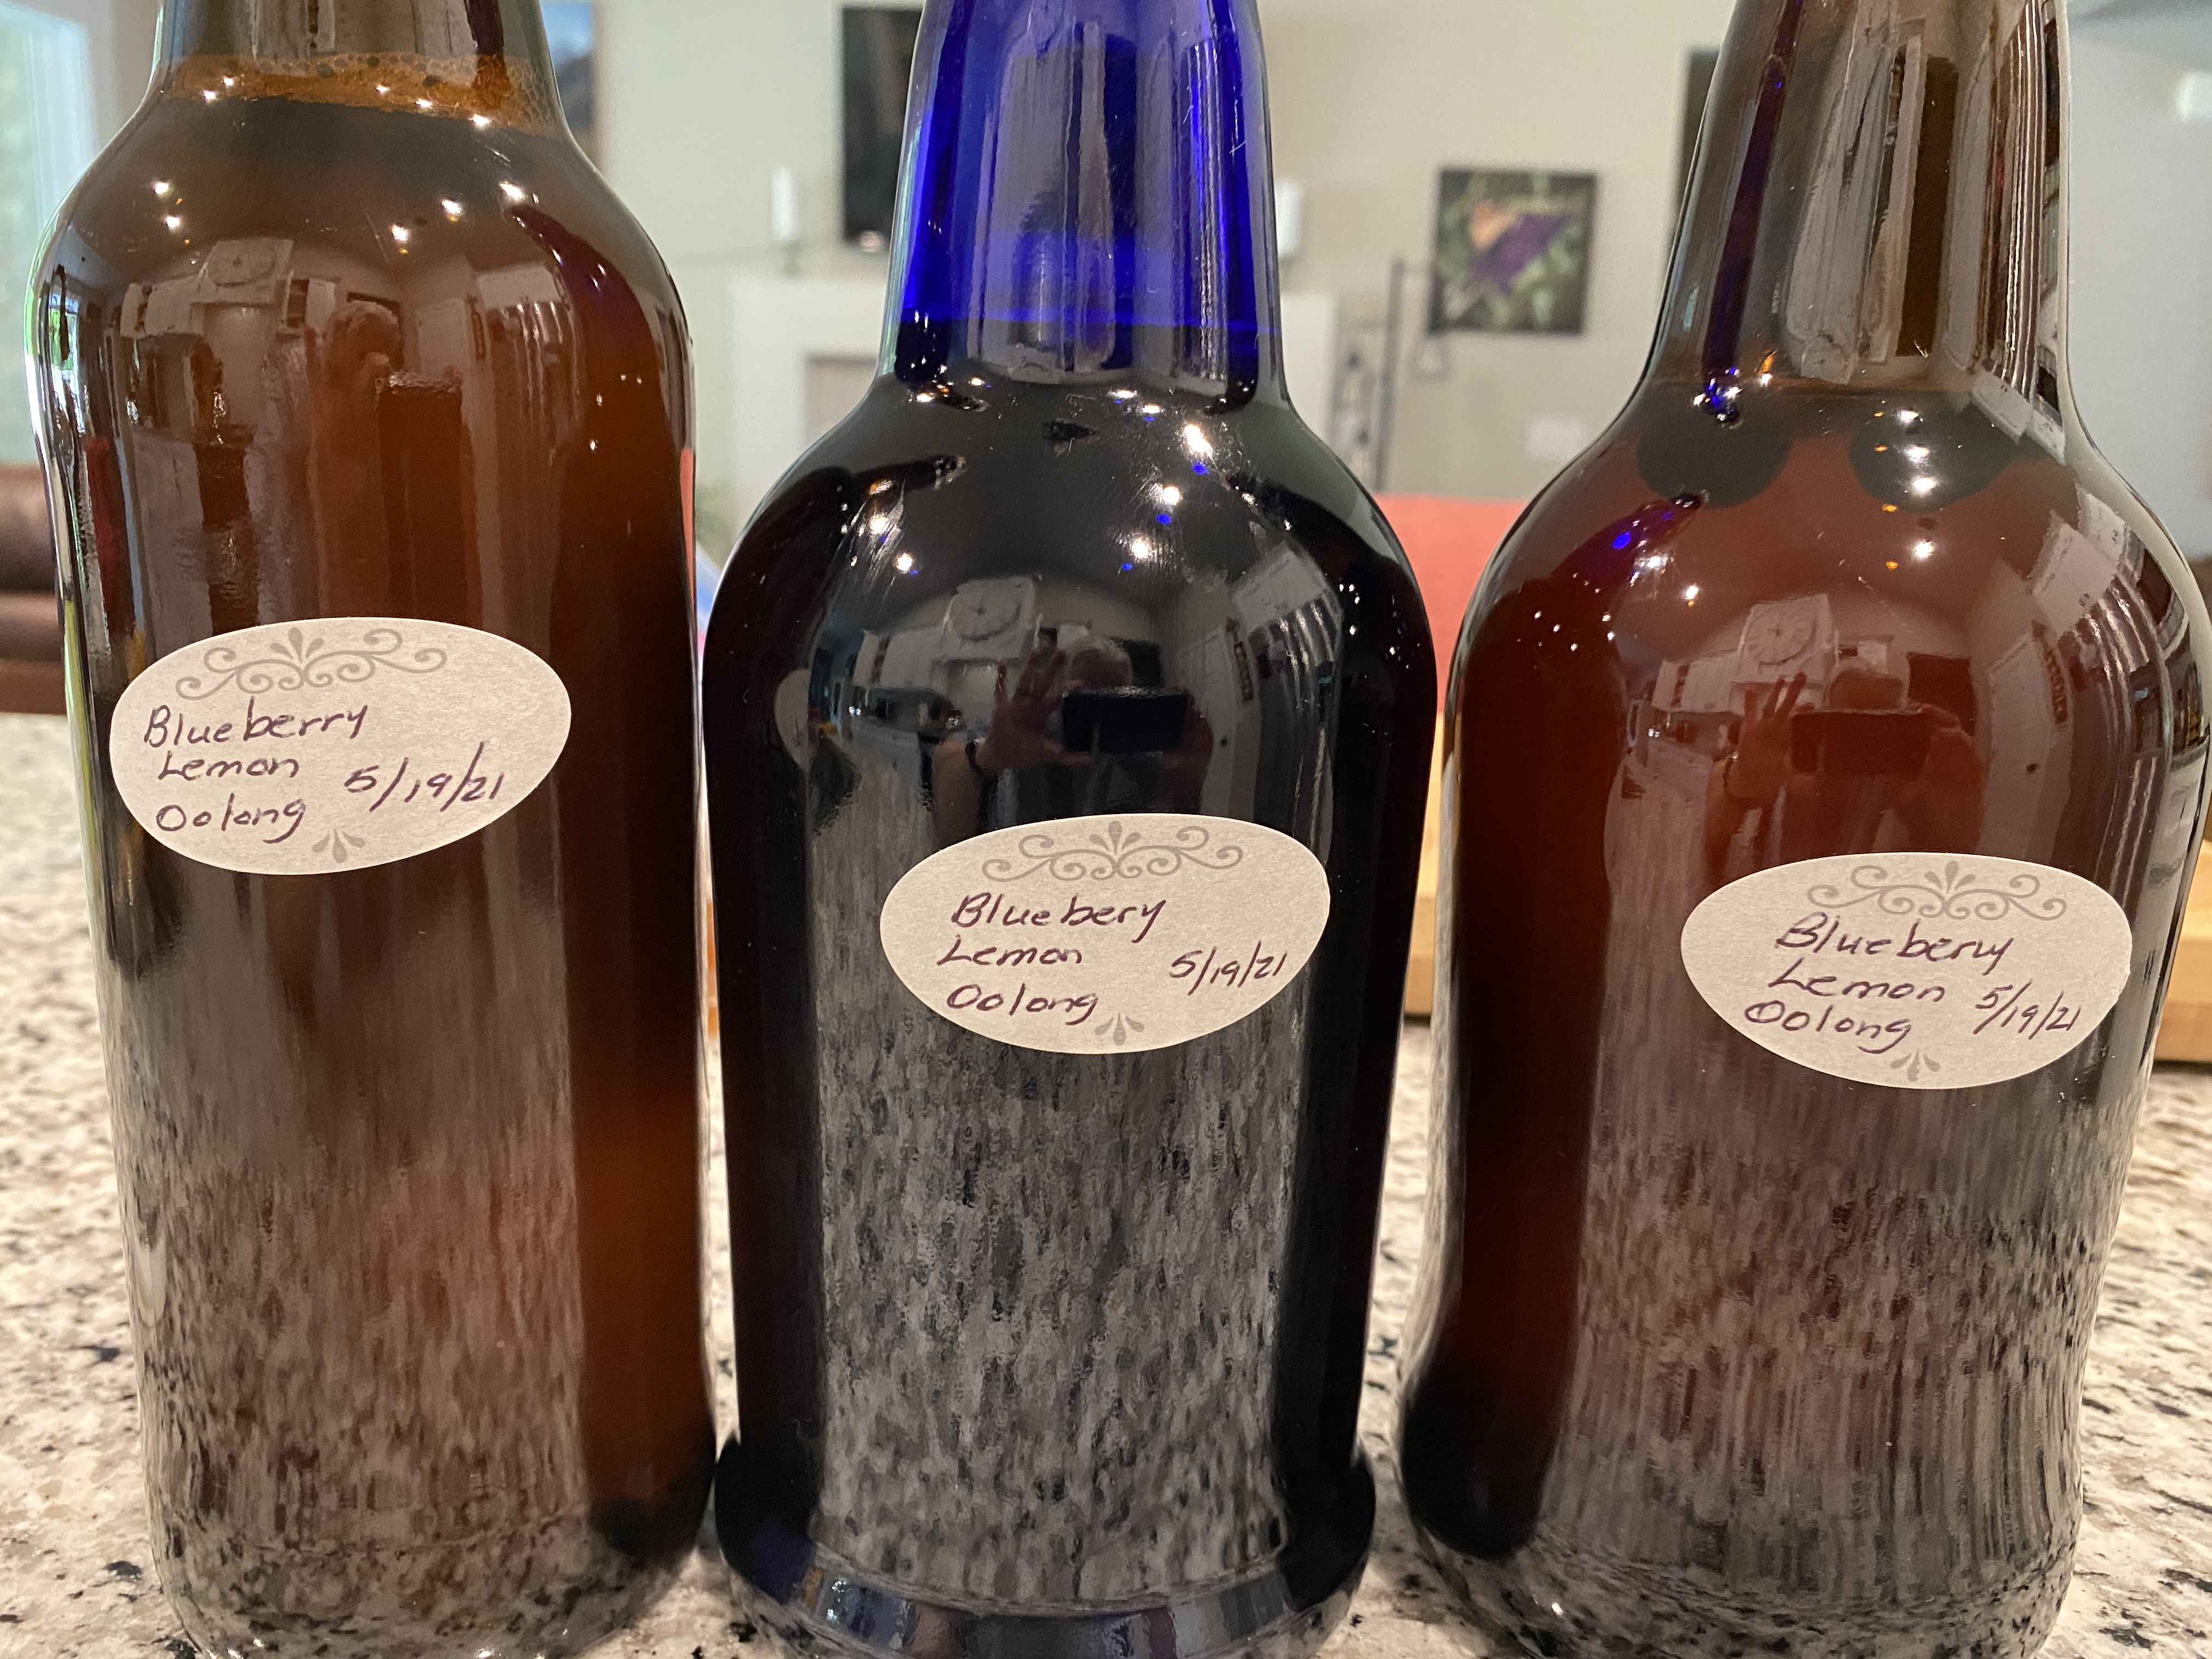
If you are making plain kombucha, you are finished. Just refrigerate your fresh brew. If you have added flavorings, the kombucha bottles will be put back to bed in its warm cupboard for an additional two days of fermentation. Refrigerate to stop the fermentation process.

A resting solution for your SCOBY between batches: 4 cups purified water, 1/4 cup organic cane sugar, 4-6 bags black tea using the same process as when making tea for kombucha. Cool the tea to 68 to 72 degrees before gently adding the SCOBY to a 2 quart glass jar and covering with a breathable topper. The SCOBY can live like this for months as long as you add fresh, cooled, sweetened tea to the jar about every month.
It’s fun to experiment with different flavors and teas. I recommend starting a “Kombucha Journal” to keep your recipes and combinations handy, including notes on the results. Enjoy!
Photography by Tamra Witt.